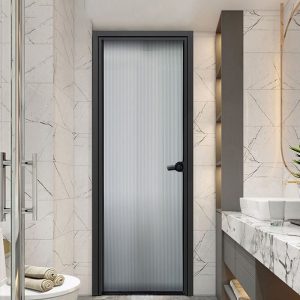
Before commencing installation of aluminum windows and doors:
1. Pre-installation Prep: Aluminum Door and Window manufacturers use this step to verify horizontal and vertical lines as well as to position window frame installation correctly. It involves three steps.
2. Verification of Opening Dimensions: For door and window opening dimensions, deviation should not exceed +-10mm in both width and height dimensions, with diagonal differences not exceeding 10mm. If they fail to comply with specified requirements, modifications should be requested immediately. Alternatively, larger openings should be addressed by adding bricks to adjust its size. If necessary, any excess material should be removed and waterproof mortar applied in order to achieve an even surface. Aluminum door and window frames must be processed to be 25mm smaller than their respective opening dimensions as indicated on drawings, so as to avoid mismatch during installation. Any misalignments should be immediately rectified.
3. Verifying three-line positions: To ensure proper installation of doors and windows, customers must coordinate with aluminum door and window manufacturers to ensure proper horizontal and vertical alignment as well as maintaining an even distance from outer edges of openings to each of the three lines.
4. Acceptance of Aluminum Doors and Windows: Acceptance criteria should include verifying the processing accuracy of door frames and leaf processing; checking certified profiles, glasses, and components against certification lists; as well as verifying whether they match both contracts and approved samples.
Aluminum Doors and Windows Frame Installation
Installation methods for door and window frames typically employ the use of foam agents on three sides and hard cement mortar seal on the bottom, rather than all four sides being sealed with cement mortar sealant. Through practical operations, this installation method for door and window frames has proven easier to control in terms of quality control with lower leakage rates than its four-sided seal method counterpart. Here is what this looks like in practice:

1. Aluminum door and window frame installations must be completed prior to applying plaster in an opening and wall surfaces. Their position within an opening may be adjusted and temporarily fixed using wooden wedges, spacers, or similar devices – however this should not cause the profile of aluminum doors and windows to deform or become damaged. Once fixed into place within an opening, all temporary fixing devices such as wedges should be immediately removed as soon as they no longer pose a threat.
2. Door and window frames must not exceed 30mm from their respective openings to ensure the quality of foam agent application.


3. Arrange aluminum door and window frames properly, using fixing clips to secure them to their opening. All fixing clips used should conform to technical requirements in their contract for aluminum alloy doors and windows.
4. Fixing clips should be secured to concrete walls or pre-reserved concrete blocks using expansion bolts, plastic expansion screws, special steel nails (cement nails), shooting nails, or similar fasteners to establish the connection; usually shooting nails are preferred.


5. Once fixing is completed, aluminum alloy windows must be filled with foaming agent using an appropriate caulking gun, starting 200mm above the bottom of each window frame and working upwards evenly until about 15mm from its outer side is covered by foam agent to facilitate later cement mortar jointing, silicone groove trenching, and silicone application. The foam should also be applied from outside for smoothness purposes and no leakages occur during application of the foaming agent.
6. Aluminum alloy doors and windows must be secured using a 1:2 dry hard cement mortar for sealing at their bases.


7. Paint the surrounding areas of the door and window frames, waterproof them as necessary, trench out a silicone groove of 6-8mm depth using rebar or other special tools, then fill this groove with neutral silicone sealant for sealing purposes.
8. Applice neutral silicone sealant to the corners and other spots on the window frame that need sealing, such as at its bottom corners.
Install Fixed Glass, Door and Window Sashes, and Hardware Accessories.
As soon as doors and windows have been properly installed, and all exterior wall decorations or other projects are complete, the customer should begin installing fixed glass, door/window sashes, and hardware accessories for their installations. It is important that during this process specific points be noted such as:
1. Before installing fixed glass or door and window sashes, ensure all debris has been cleaned from within their frames.
2. To install fixed glass, if the pressure line faces outward, the sealant must be applied prior to pressing it into place in order to secure it and prevent leakage. For casement door and window glass installations, see this method instead.
3. When installing door and window sashes, select hinges or sliding braces as fasteners. Before attaching them with screws, be sure to apply glue so as to prevent water infiltration through their holes.
4. Proper installation of hardware accessories is crucial to ensure normal operation and air and water tightness.
5. To prevent leakage during door and window installations, sealant must be applied appropriately at each stage.
Protecting Aluminum Alloy Doors and Windows During Installation
Aluminum alloy doors and windows need constant protection during the installation process:
1. Apply protective film to the surfaces of the profiles and hardware.
2. Apply protective film to the inside and outside surfaces of the glass (the film on the inside should be removed and cleaned uniformly after painting, and if necessary, new protective film can be applied).
3. Put wooden U-shaped protective covers under the door and window frames.
Check Aluminum Windows And Doors
After the installation of aluminum alloy doors and windows is completed, a 24-hour water immersion test should be carried out to check for any leakage points.
Key Points of Aluminum Alloy Door and Window Installation
Installation workers of aluminum alloy doors and windows must take special note during their process to ensure quality installation services in areas like these:

1. Once aluminum doors and windows materials have been delivered, they should be neatly organized on site. Door and window frames and sashes must be stored indoors neatly to prevent accidental damages to them by humans.
2. Placing concrete blocks at door and window openings should be planned logically, which can be determined by looking at where the fixing plates are situated (ideally no further than 150mm from any corner of a frame, while the center distance between fixing plates in other parts should not exceed 500mm).


3. Foam agent should be applied 200mm from the bottom edge of an aluminum window. Any gaps between its frame and the foam agent’s bottom must be sealed using cement mortar to ensure there are no weak points at its corners.
4. When sealing and embedding cement mortar on all four sides, care must be taken when applying protective film so as to not press it into the cement mortar and allow water infiltration along its edge. Alternatively, window and door manufacturers should be instructed to leave 3-5mm gap from the bottom edge of their profiles unprotected with film.


5. Poor door and window protection can lead to the U-shaped protective coverings on door thresholds not being applied on time, leading to them being trampled and the profiles being damaged.
Standard installation Points Of Windows And Doors

Upper Part Of Casement Windows Frame

Lower Part Of Casement Windows Frame

Upper Part Of Casement Doors Frame

Lower Part Of Casement Doors Frame

Upper Part Of Sliding Windows Frame

Lower Part Of Sliding Windows Frame

Upper Part Of Sliding Doors Frame