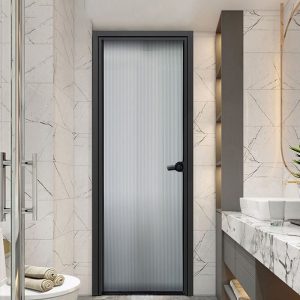
We will first introduce the processing procedures for the three main materials: aluminum profiles, hardware accessories, and glass. Then, we will delve into how window and door factories carry out the production and processing of windows and doors (focusing on the internal processes). Additionally, we’ll discuss potential issues that may arise during this production cycle.
The Processing Procedures For The Main Materials
Aluminum Profiles
The aluminum profile processing process mainly involves three steps: aluminum rod melting and casting, profile extrusion aging, and surface treatment. For mass production, the entire process of machining typically takes about 3 to 4 days, including transportation to the processing factory, which usually adds another 7 to 10 days. Overall, aluminum profile processing from production to delivery at the factory is generally promised to be around 15 days by profile manufacturers. The specific steps in the profile processing are as follows:

Aluminum Smelting
Alloy casting, The process of alloy casting involves melting pure aluminum ingots in a furnace, adding other alloying elements, and then pouring the molten mixture into molds to cool and solidify. The result is an alloyed aluminum rod ready for extrusion.

Aluminum Extrusion
After the aluminum rod is shaped, it can be sent to the aluminum extrusion line. The extrusion machine first heats the aluminum rod to the appropriate temperature and then feeds it into the extrusion machine’s mouth for extrusion. Different molds can be used to extrude profiles with various cross-sectional shapes. The freshly extruded profiles do not have sufficient strength; therefore, they are cut to the desired length and then undergo a 4 to 8-hour aging process in a heat treatment furnace to enhance their strength.
Aluminum Surface Treatment
When aluminum profiles have reached a certain level of strength after extrusion, they are ready for surface treatment. The principles behind two of the surface treatment methods—powder coating and fluorocarbon coating—are fundamentally similar. Similarly, the basic principles for anodizing and electrophoretic coating are consistent.
Before any surface treatment, a pre-treatment step is essential. This pre-treatment serves to remove dust, dirt, grease, fingerprints, and other contaminants from the surface of the extruded profiles, leaving behind a clean and pure metal substrate.

Powder Spray Painting: This method involves spraying powdered paint particles onto a surface. The powder adheres to the material due to electrostatic attraction and forms a uniform coating. Afterward, the coated object is baked to cure the powder, resulting in a durable finish. Powder coating is commonly used for various applications, including metal surfaces and architectural elements.
Fluorocarbon Spray Painting: Also known as PVDF coating (polyvinylidene fluoride), this technique uses a special type of paint that contains fluorocarbon polymers. Fluorocarbon coatings are highly durable, weather-resistant, and UV-stable. They are commonly applied to aluminum curtain walls, window frames, and other architectural components. The resulting finish is long-lasting and maintains its color and gloss over time.
Anodizing: Anodizing is a surface treatment process for aluminum materials. In this process, the aluminum is placed in a water-soluble emulsion, and a direct current is applied. As a result, a protective resin paint film layer is artificially formed on the surface of the aluminum oxide film.
Electrophoresis: Electrophoresis is a technique where charged particles (such as paint or coatings) are deposited onto a surface using an electric field. In the case of anodic electrophoresis, negatively charged material is deposited on the positively charged electrode (anode).
Hardware accessories

Stainless Steel Accessories
These accessories are commonly made from stainless steel and include items such as friction hinges, wind braces, and other related components. The primary manufacturing processes for these hardware accessories are relatively straightforward, involving cutting, stamping, punching, and assembly using 304 stainless steel strips or sheets.

Zinc Alloy Accessories
Zinc alloy accessories primarily refer to hardware components made by extruding zinc alloy and assembling them. Common examples include handles, hinges, and pull handles. The primary manufacturing process for these hardware accessories is similar to that of aluminum alloy profiles. Here are the steps involved:
Extrusion: First, purchased zinc alloy material is placed into an extrusion machine. The machine extrudes the material into the desired shape for the hardware component.
Deburring: After extrusion, any rough edges or burrs on the component are removed.
Powder Coating: The extruded zinc alloy parts are then sent to a powder coating line. Powder coating involves applying a layer of powdered paint to the surface. The charged powder adheres to the metal due to electrostatic attraction. The coated parts are then heated to cure the powder, resulting in a durable and uniform finish.
Assembly: Finally, the coated components are assembled into the final product, such as locks, hinges, or pull handles.
Zinc alloy hardware accessories are widely used due to their good strength, corrosion resistance, and aesthetic options for surface finishes.
Plastic Accessories

Plastic accessories components such as pulleys and lifting blocks. These components are made from plastic particles and are molded using an injection molding machine. After assembly with metal parts, they become finished products.
Glass
Tempered Glass
The process of Tempered glass involves several steps. First, the glass is cut to the desired dimensions. Next, it is placed in a tempering furnace, where it is heated to approximately 650°C (1202°F). Afterward, the glass undergoes rapid cooling, resulting in changes to its internal structure and the formation of tempered glass.
The process of Tempered glass involves several In the case of semi-tempered glass, the process does not include the rapid cooling step. Instead, the glass is allowed to cool naturally at room temperature. Semi-tempered glass has lower surface stress intensity compared to fully tempered glass. Although it shares similar post-breakage characteristics with regular glass, it cannot be used as true tempered glass.

Insulated Glass
Insulated glass consists of four main components: glass sheets, desiccants, spacer bars, and dual-sealant layers. Let’s break down the process of creating hollow glass:
Glass Cutting and Preparation: The glass sheets are first cut to the desired dimensions. These sheets are typically low-emissivity (LOW-E) glass, which helps with energy efficiency.
Desiccant Filling: Desiccants (drying agents) are placed inside the spacer bars. Mechanical filling ensures that the desiccants are evenly distributed and fully packed.
Spacer Bar Sealing: The spacer bars, containing the desiccants, are hermetically sealed using a butyl rubber sealant (often referred to as the first seal). This creates an airtight chamber within the spacer bars.
Assembly and Sealing: The sealed spacer bars are positioned on the cleaned and dried glass surface. The glass sheets are then pressed together using an assembly machine (also known as a press). A second sealant, typically made of polysulfide (polythioether) or silicone, is applied around the edges to create the final seal.
Curing and Quality Control: The assembled glass unit is allowed to cure and set. Quality control checks are performed to ensure proper sealing, absence of defects, and correct dimensions.

In summary, the process involves filling the spacer bars with desiccants, sealing them, assembling the glass sheets, and applying dual-sealant layers. The resulting hollow glass unit provides improved insulation and energy efficiency for windows and doors.
Laminated Glass
The production process of laminated glass is relatively straightforward. After cutting and tempering, two or more glass sheets are sandwiched together with a layer of PVB (polyvinyl butyral) interlayer. The PVB thickness is typically measured in units of 0.38 mm, and it is multiplied as needed. Once fixed, the glass assembly is placed into a high-pressure autoclave for high-temperature and high-pressure heating. After cooling, it becomes laminated glass.

Low-E Glass
Low-E glass, also known as low-emissivity glass, is a type of energy-efficient glass. It is produced by applying a thin coating of multiple layers of metal or other compounds to the glass surface. These coated layers exhibit high transmittance for visible light and high reflectance for mid-to-far infrared radiation. As a result, Low-E glass offers excellent insulation properties and good transparency compared to regular glass and traditional coated architectural glass.
There are two primary production methods for Low-E glass:
- Pyrolytic (Hard Coat) Method:
In this method, a thin layer of tin oxide is incorporated into the glass while it is still hot. The tin coating is welded to the glass during this stage, resulting in a durable coating. Pyrolytic Low-E glass is often used for architectural applications due to its robustness. - Magnetron Sputter Vacuum Deposition (MSVD or Soft Coat) Method:
MSVD is an offline process commonly used worldwide.
The glass is placed in a vacuum environment, and metal ions (such as silver) are sputtered onto the glass surface. The resulting thin film provides excellent optical properties, including color richness and high light transmittance. MSVD-produced Low-E glass has superior thermal performance compared to pyrolytic methods, but it is more fragile and typically used in insulating glass units (IGUs).

Low-E glass minimizes ultraviolet and infrared light transmission while maintaining visible light transmittance. It significantly improves energy efficiency, reduces heat loss, and contributes to environmental sustainability in buildings.
Windows And Doors Manufacturing Process
An aluminum door and window processing factory is essentially an integrated supplier that takes semi-finished products produced by profile factories, glass factories, and hardware accessory factories and performs further processing and assembly to create aluminum alloy doors and windows. Within the factory, the primary focus is on the processing and assembly of profiles and glass. The specific processing steps are as follows:
Cutting The Profiles
Upon the arrival of the profiles at the factory, workers first need to cut the profiles according to the dimensions specified in the drawings. The primary profiles, such as frame materials, sash materials, and intermediate stiffeners, all require cutting on a cutting machine. This machine is equipped with two cutting blades and simultaneously cuts the profiles from both ends, ensuring precise profile-cutting.

Drilling, Milling, And Punching Operations

After cutting, the profiles need to undergo drilling, milling, punching, and other processes based on the assembly requirements for doors and windows. These processes create the necessary holes, slots, and other spatial features on the surface of the profiles for installation. Some advanced fabrication factories use machines that combine drilling, milling, and punching operations, although such equipment is primarily used in curtain wall projects and less commonly in door and window projects.
The Assembly For Door And Window Frame Materials
The Active Corner Bracket Method
The Active Corner Bracket Method is a commonly used approach for assembling door and window frames.
Here are the steps involved:
1.secure the four corners of the profiles together. This is typically done using screws that anchor into the profiles.
2.Apply sealant to seal any holes at the corner joints to prevent water infiltration.
3.Place galvanized washers at the anchoring points and then secure them with screws.

For sliding doors or window frames, it’s necessary to place water-resistant gaskets at the corner joints, but gluing is not required.
Please note that different window and door manufacturers may have variations in their implementation of the Active Corner Bracket Method. Regardless, sealing the corners both internally and externally is essential to prevent water ingress.
Butt Joint Method
1.For butt joint assembly, the surface of the aluminum alloy profiles at the joint is first coated with end-face adhesive.
2.Corner brackets are then inserted into the 45° profiles, and precision machinery is used to achieve a solid connection through impact extrusion.
3.Structural adhesive is injected into the joint through adhesive holes, and excess adhesive can be observed where the aluminum material is extruded.
4.This seamless joint method is less prone to water infiltration and cracking.

However, butt joint assembly must be done during production and does not support on-site framing.
It is suitable for standardized mass production, offering high efficiency, and is often chosen by large manufacturers.
Glass installation
Aluminum alloy doors and windows glass for casement windows and sliding windows are typically assembled in the factory, while fixed window glass is usually installed on-site. For casement windows and fixed windows, glass is commonly secured using pressure lines, whereas sliding windows are typically held in place using profile clamps and adhesive sealant. All glass is required to be protected with plastic film before being transported to the installation site.

For the installation process of casement windows and fixed windows, follow these steps
1.lace Glass Gaskets at the Bottom of the Sash.
2.Secure the Glass with Pressure Lines: Press the pressure lines around the glass in a top-to-bottom sequence.
3.Insert Plastic Strips or Glass Pads Between the Pressure Lines, Sash Material, and Glass: This flexible connection ensures proper alignment.

The Instructions For Installing Sliding Window Glass
1.Install Weather stripping and Rollers in the Lower Sash
2.Place Plastic Components at the Vertical Sash.
3.Insert the Upper Sash Material and Vertical Sash Material into the Sliding Window Glass. Then, add glass pads to the lower frame material and secure the glass in place.
4.Use Bolts for Fixation. Insert weatherstripping and plastic strips between the sash material and the glass to create a flexible connection. Finally, apply adhesive sealant to seal any gaps.
Packing
After the assembly of frame materials and sashes, it is necessary to wrap the profile surfaces with protective film. This protective film should be kept intact until the project is completed and delivered.

Production Time of Aluminum Doors and Windows
According to the information provided, the production and processing of aluminum alloy doors and windows mainly involve the following components:
Extrusion and Surface Treatment of Profiles: The profiles are extruded and undergo surface treatment before arriving at the factory. This process typically takes 20 to 25 days.
Hardware Accessories: The hardware components take approximately 20 days, and custom-ordered glass requires 10 days.
Assembly in the Factory: The assembly of doors and windows within the factory usually takes 3 to 5 days.
Among these processes, profile extrusion, surface treatment, and factory assembly are critical steps. The customization of hardware accessories and glass can be completed during these stages. Therefore, from placing the order for profiles to the installation of door and window frames and sashes, a reasonable production period for each batch of aluminum alloy doors and windows should fall within 23 to 30 days.
When notifying suppliers and requesting procurement units, project departments should consider the time required for window and door fabrication to establish a realistic timeline.